How to Add Google Tag Manager to Grav CMS
![]()
Table of Contents
Google Tag Manager (GTM) is a powerful tool that allows webmasters to manage website tags without having to modify the code. This means you can integrate various services like analytics, remarketing, and more with just a few clicks. GTM is especially helpful for those who might not be well-versed in coding or for different teams to access and change tracking metrics without developer intervention.
Grav CMS, on the other hand, is a modern, flat-file CMS that prioritizes simplicity and flexibility. Integrating tools and services into Grav typically requires some familiarity with its file structure and templating system.
Installing Google Tag Manager is very simple if you know your way around Grav, and only requires editing one file in most cases of a standard installation. In this guide, we'll walk through the steps to integrate GTM into your Grav CMS.
Google Tag Manager
Google Tag Manager (GTM) allos you to track user behavior, manage advertising pixels, or use various other third-party integrations without constantly editing your website's backend.
To get started with adding GTM to your Grav CMS:
-
Create an Account: If you haven't already, sign up for a free account at tagmanager.google.com.
-
Set Up a New Container: Once logged in, create a new container for your website. The container will store all the tags you want to deploy on your website.
-
Get Your GTM Code: Navigate to Admin > Install Google Tag Manager in the GTM dashboard. Here, you'll be presented with two pieces of JavaScript code. This is what you'll need to add to your website to enable GTM.
Note: When implementing the code into your website, you will use your own unique GTM identifier where it says YOUR-GTM-CODE-HERE.
<!-- Google Tag Manager -->
<script>(function(w,d,s,l,i){w[l]=w[l]||[];w[l].push({'gtm.start':
new Date().getTime(),event:'gtm.js'});var f=d.getElementsByTagName(s)[0],
j=d.createElement(s),dl=l!='dataLayer'?'&l='+l:'';j.async=true;j.src=
'https://www.googletagmanager.com/gtm.js?id='+i+dl;f.parentNode.insertBefore(j,f);
})(window,document,'script','dataLayer','YOUR-GTM-CODE-HERE');</script>
<!-- End Google Tag Manager -->
<!-- Google Tag Manager (noscript) -->
<noscript><iframe src="https://www.googletagmanager.com/ns.html?id=YOUR-GTM-CODE-HERE"
height="0" width="0" style="display:none;visibility:hidden"></iframe></noscript>
<!-- End Google Tag Manager (noscript) -->Understanding the Code Blocks: The first code block is the main GTM JavaScript snippet that activates the GTM container on your website. The second code is a noscript version, which ensures that users who have JavaScript disabled in their browsers can still be tracked.
Once you have these codes, you're ready to integrate them into your Grav CMS, as explained in the subsequent section.
Grav CMS
Grav CMS, being a modern flat-file content management system, offers flexibility and ease of use, especially when it comes to integrating third-party tools such as Google Tag Manager. The process to embed the Tag Manager scripts is straightforward, but it's important to be attentive to details to ensure seamless integration.
With the Google Tag Manager codes you've obtained, the next step involves embedding them into your Grav CMS theme. But before you do that, ensure you have a backup of your website and theme files. This is a best practice whenever making changes to core files.
Now, let's proceed with the integration:
-
Important Reminder: Always ensure you're editing your child theme rather than the parent theme. Editing the child theme preserves your customizations, allowing updates to the parent theme without overwriting your changes.
-
Accessing Your Theme File: Navigate to the
base.html.twigfile. This file is typically found in your active child theme's directory. The standard path isROOT-DIRECTORY-NAME/user/themes/CHILD-THEME-NAME/templates/partials/, though it can vary based on your specific setup. -
Embedding the Code:
-
Header Integration: Locate the opening
<head>tag in thebase.html.twigfile. Immediately below this tag, paste the first Google Tag Manager code block.
-
Body Integration: Scroll down until you find the opening
<body>tag. Right after this tag, paste the second Google Tag Manager code block.
-
-
Save Your Changes: After embedding the codes, save the
base.html.twigfile. If there are no syntax errors or misplaced tags, the site should load as expected. If there are syntax errors, Grav should notify you as soon as you reload the page.
Site Speed - Advanced
For developers prioritizing site speed, Google's own PageSpeed Insights is an invaluable tool for evaluating and optimizing website performance. One common feedback from PageSpeed Insights is the identification of render-blocking resources, which can significantly slow down your site's perceived load time.
Surprisingly, Google Tag Manager (GTM) code, when placed as recommended by Google, can be flagged as a render-blocking resource. This paradoxical situation can be a dilemma for developers aiming for both site analytics and optimal site speed.
Why is GTM Code Render-Blocking?
When the GTM code is placed in the <head> or immediately after the opening <body> tag, the browser has to process this script before rendering the rest of the page. As GTM can load various tags and scripts, this can introduce delays, especially if any of those tags have issues or are slow to respond.
Alternative Placement for GTM
A practical solution, which I have employed on multiple Grav sites, is to place both the GTM scripts right before the closing </body> tag of the base.html.twig template. This ensures that the rest of the page content is loaded and rendered before the GTM scripts are executed.
<!-- Your site's content -->
<!-- Google Tag Manager -->
<script>(function(w,d,s,l,i){w[l]=w[l]||[];w[l].push({'gtm.start':
new Date().getTime(),event:'gtm.js'});var f=d.getElementsByTagName(s)[0],
j=d.createElement(s),dl=l!='dataLayer'?'&l='+l:'';j.async=true;j.src=
'https://www.googletagmanager.com/gtm.js?id='+i+dl;f.parentNode.insertBefore(j,f);
})(window,document,'script','dataLayer','YOUR-GTM-CODE-HERE');</script>
<!-- End Google Tag Manager -->
<!-- Google Tag Manager (noscript) -->
<noscript><iframe src="https://www.googletagmanager.com/ns.html?id=YOUR-GTM-CODE-HERE"
height="0" width="0" style="display:none;visibility:hidden"></iframe></noscript>
<!-- End Google Tag Manager (noscript) -->
</body>Limitations to Consider
While this method enhances page load speed, there are a few caveats to be aware of:
- Delayed Tracking: With the GTM code placed at the end, there's a slight possibility of missing out on tracking some rapid user interactions, especially if a visitor leaves the page before the scripts execute.
- Potential for Inaccuracy: If a tag within GTM relies on elements or scripts earlier in the page, it might not fire correctly or could capture inaccurate data.
- Dependence on Full Page Load: Some tags or triggers might not work as intended if they're dependent on elements or scripts that load earlier than the GTM script.
While this advanced placement method offers benefits in site speed optimization, it's important to weigh these advantages against the potential limitations in tracking accuracy. If the site requires specific triggers to fire earlier in the page-loading process, this placement technique may not be the ideal solution.
Clear the Cache
Grav CMS utilizes an aggressive caching system to enhance the performance of your website. However, when you make changes to your site, especially critical changes like adding Google Tag Manager, the cache might still hold onto the older versions of the pages.
Here's how to clear the cache in Grav CMS:
- Via Admin Panel: If you're using the Grav Admin Plugin, navigate to the dashboard and you'll find a "Clear Cache" button on the top right. Clicking this will clear all cached data.
- Via Command Line: If you have shell access to your server, navigate to your Grav installation directory and run the command
bin/grav clear-cache.
After clearing the cache, it's a good practice to check your site in an incognito or private browsing window. This ensures that you're viewing the site without any local cached data from your browser.
Good luck, and always make it a habit to clear the cache after major site updates.
Advanced Web Server Monitoring
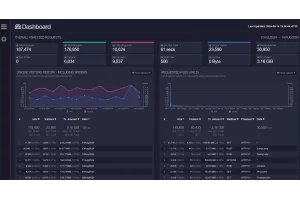
This wasn't part of the original post, but I came back to add it in case anyone is interested in more advanced web server monitoring you can't get from something like Google Analytics. If you want a deeper dive into the non-user traffic (like bots) your site and server are getting bombarded with on a regular basis, I just finished a write up about an open source monitoring tool called GoAccess.
You can read it here:
Using GoAccess to Monitor Multiple Websites at Once